Hinweis: Code scanning befindet sich derzeit in der Beta-Version und kann sich jederzeit verändern. For more information about taking part in the beta, sign up here.
Informationen zu code scanning
With code scanning, developers can quickly and automatically analyze the code in a GitHub repository to find security vulnerabilities and coding errors.
The table below summarizes the available types of analysis for code scanning, and provides links on enabling the feature for individual repositories.
|
|
Options for generating alerts |
|---|---|
| CodeQL | Using GitHub Actions (see "Enabling code scanning using actions") or using the CodeQL runner in a third-party continuous integration (CI) system (see "Running code scanning in your CI system"). |
| Third‑party | Using GitHub Actions (see "Enabling code scanning using actions") or generated externally and uploaded to GitHub Enterprise (see "Uploading a SARIF file to GitHub"). |
For the users of Ihre GitHub Enterprise Server-Instanz to be able to enable and use code scanning in their repositories, you need, as a site administrator, to enable this feature for the whole appliance.
How do I know if code scanning is enabled for my appliance
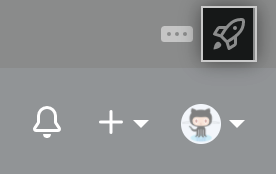
- Klicke in der oberen rechten Ecke einer beliebigen Seite auf .
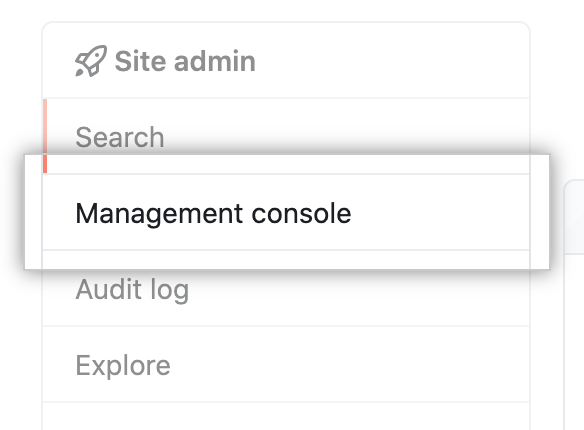
- Klicke auf der linken Seitenleiste auf Managementkonsole.
- Check if there is an Advanced Security entry in the left sidebar.
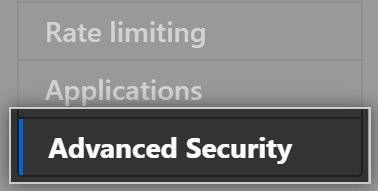
If you can't see Advanced Security in the sidebar, it means that your license doesn't include support for Advanced Security features including code scanning. The Advanced Security license gives you and your users access to features that help you make your repositories and code more secure.
code scanning aktivieren
Warning: Changing this setting will cause GitHub Enterprise Server to restart. You should time this change carefully, to minimize downtime.
- Klicke in der oberen rechten Ecke einer beliebigen Seite auf .
- Klicke auf der linken Seitenleiste auf Managementkonsole.
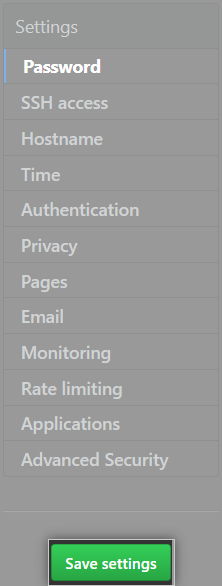
- Klicken Sie auf der linken Seitenleiste auf Advanced Security.
- Under "
Advanced Security," click Code scanning.
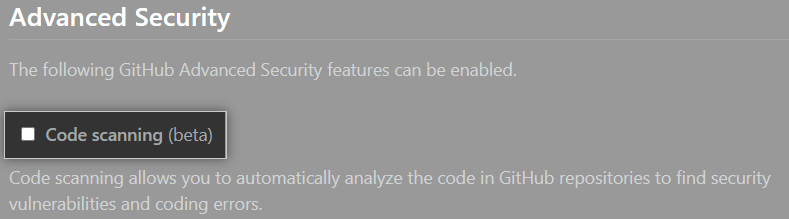
- Klicke auf der linken Seitenleiste auf Save settings (Einstellungen speichern).
- Warten Sie auf den Abschluss der Konfigurationsausführung.
Running code scanning using GitHub Actions
Setting up a self-hosted runner
If you are enrolled in the GitHub Actions beta, then GitHub Enterprise Server can run code scanning using a GitHub Actions workflow. First, you need to provision one or more self-hosted GitHub Actions runners in your environment. You can provision self-hosted runners at the repository, organization, or enterprise account level. For more information, see "About self-hosted runners" and "Adding self-hosted runners."
You must ensure that Git is in the PATH variable on any self-hosted runners you use to run CodeQL actions.
Provisioning the action
To run code scanning on GitHub Enterprise Server with GitHub Actions, the appropriate action must be available locally. You can make the action available in three ways.
- Recommended You can use GitHub Connect to automatically download actions from GitHub.com. The machine that hosts your instance must be able to access GitHub.com. This approach ensures that you get the latest software automatically. For more information, see "Configuring GitHub Connect to sync GitHub Actions."
- If you want to use the CodeQL analysis workflow, you can sync the repository from GitHub.com to GitHub Enterprise Server, by using the CodeQL Action sync tool available at https://github.com/github/codeql-action-sync-tool. You can use this tool regardless of whether Ihre GitHub Enterprise Server-Instanz or your GitHub Actions runners have access to the internet, as long as you can access both Ihre GitHub Enterprise Server-Instanz and GitHub.com simultaneously on your computer.
- You can create a local copy of the action's repository on your server, by cloning the GitHub.com repository with the action. For example, if you want to use the CodeQL action, you can create a repository in your instance called
github/codeql-action, then clone the repository from GitHub.com, and then push that repository to your instance'sgithub/codeql-actionrepository. You will also need to download any of the releases from the repository on GitHub.com and upload them to your instance'sgithub/codeql-actionrepository as releases.
Configuring GitHub Connect to sync GitHub Actions
- If you want to download action workflows on demand from GitHub.com, you need to enable GitHub Connect. For more information, see "Enabling GitHub Connect."
- You'll also need to enable GitHub Actions for Ihre GitHub Enterprise Server-Instanz. For more information, see "Enabling GitHub Actions and configuring storage."
- The next step is to configure access to actions on GitHub.com using GitHub Connect. For more information, see "Enabling automatic access to GitHub.com actions using GitHub Connect."
- Add a self-hosted runner to your repository, organization, or enterprise account. Weitere Informationen findest Du unter "selbst-gehostete Runner hinzufügen."
After you configure a self-hosted runner, users can enable code scanning for individual repositories on Ihre GitHub Enterprise Server-Instanz. The default code scanning workflow uses the on.push event to trigger a code scan on every push to any branch containing the workflow file.
Running code scanning using the CodeQL runner
If your organization isn't taking part in the beta for GitHub Actions, or if you don't want to use GitHub Actions, you can run code scanning using the CodeQL runner.
The CodeQL runner is a command-line tool that you can add to your third-party CI/CD system. The tool runs CodeQL analysis on a checkout of a GitHub repository. For more information, see "Running code scanning in your CI system."
Disabling code scanning
Warning: Changing this setting will cause GitHub Enterprise Server to restart. You should time this change carefully, to minimize downtime.
- Klicke in der oberen rechten Ecke einer beliebigen Seite auf .
- Klicke auf der linken Seitenleiste auf Managementkonsole.
- Klicken Sie auf der linken Seitenleiste auf Advanced Security.
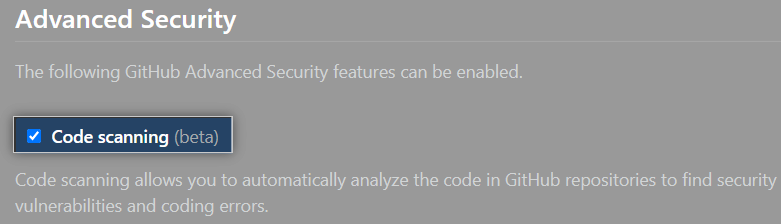
- Under "
Advanced Security", unselect Code scanning.
- Klicke auf der linken Seitenleiste auf Save settings (Einstellungen speichern).
- Warten Sie auf den Abschluss der Konfigurationsausführung.