Customize your event
Now that you've created an event, it's time customize it in the Microsoft Mesh app and add any run-of-show tools you'd like to use.
At a high level, there are three major steps to customize your event or template:
Add content using the Environment Editor (or playable content uploaded from Unity to a custom environment).
Select the artifact to edit its properties.

Configure content with the Control Panel for your live event. Ensure that you've added artifacts to the control panel to be used in the production of your event.

Save changes in the Event Customization window.

Considerations before starting your event
Customize and save before event
Saving is not available once event is joined. Plan to customize and save your event at-least 30 minutes before the event start time.

Tip
Who should customize an event?
Anyone who has been invited as a Co-organizer can customize an event. Do this with caution, knowing that any edits you make will affect the environment that event participants will join in.
Add content
Use the Environment editor to place content in your environment and customize the content displayed in each artifact.
Currently, the three artifacts that you can add to your event are Video, Screenshare, and Image.

Add content with the Environment editor
Use the environment editor to add content to your environment that can be controlled during your run-of-show.
Open the Mesh app on your computer or use the link in the calendar invite.
Look for the event in the Upcoming category and select it.

In the Event details window, select Customize.

Select the Join now button.
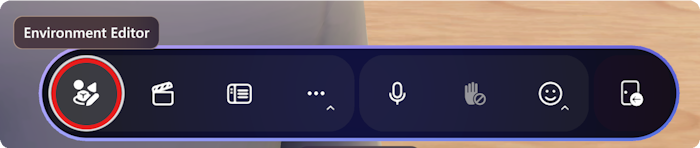
Once it loads, Select the Environment editor button.

Select the + plus button to open the Catalog of artifact you can add. Select one to add it to the environment editor.

Once you've added an artifact, you'll see it show up in the Artifacts window as shown below:

Note the Copy, Edit, and Delete buttons available for the selected artifact.
Now you can manipulate the artifact as you'd like by selecting it with your cursor, dragging it to another location, or using the edges of the artifacts to scale them as you see fit.

To position your artifact - with the environment editor open:
- Select and drag your artifact to move it left, right, up, or down.
- Alt + Select and drag up or down to move the artifact toward and away from you.
- Shift + Select and drag up or down to make the artifact bigger or smaller.
- You can also use the rotation and scale handles on the artifact to rotate and scale your artifact. Just select the handle and drag to rotate or scale.
Make sure you check out the position from different angles to verify you’ve placed it properly.
Tip
while you are moving an artifact you’ll see a small line drawn from your artifact down to the floor. This can help you position your artifacts relative to landmarks in the scene such as the edge of a stage or a piece of furniture.
Video artifact requirements
For video artifacts, you must:
Use .MP4 file type only.
Use direct links to video files that are stored on SharePoint or HTTPS URLs. Links to video services like YouTube, Vimeo, etc. are not supported
For example, use the Share or the Copy Link functionality in SharePoint to copy the link of the video you want to share and paste it in the Video player artifact URL field.

Edit artifact controls
Once you've added an artifact, you can maneuver it around the spaces and select the it to edit the controls.
Select an added artifact and adjust the controls to suit your preferences.

Configure the controls for the artifact. For example, you can add the URL for your video:

Note
The only video type that is supported is .MP4 inside the video artifact.
Prepare content with the Control Panel
Important
You must add the artifacts to the Control Panel and save before starting your event.
Use the Control Panel to prepare your artifacts to be used during an event. Like having a technical booth for theatrical technicians, it's designed to give the organizer the ability to orchestrate a performance in real time.
Once you're satisfied with your artifact, open the Control Panel.
Select the + add button to add your artifact.

In the Select content window, select the artifact then select Add. You will see it show up in the Control Panel.

Control Panel Notes:
- Playable content can be added from the environment editor or from a Unity project that has been uploaded to a custom environment. Reference the Choose your journey article to get started with adding custom content.
Save your content
Before you start your event, you must save the changes that you've made to your environment.
Select the Event Customization button, then select Save changes or Revert changes.
Preview the live run of your event
Within a Customize event experience, open the Control Panel, then Toggle to Preview Mode.
While in preview mode, you can test out using the control panel to play your video or interact with your content.

Feedback
Submit and view feedback for